Saturday, October 11, 2014

One of the best reasons to keep cosplaying

I had to think a long time before posting this photo online, since I don't know the little girl in the photo (and also cause my face looks like a bag of poop due to photo being snapped in the middle of a laugh). But I did it anyways.

This little girl was so happy to see me dressed up as Anna at the cinema (my job, this was during "Children's Day") today, she didn't know what to do, she just couldn't stop smiling. And she almost didn't want to let go of my hand after we took the photo!

It's when I see photos like this one that every hour I've spent stressing out over cosplay is suddenly worth it. It's worth everything.

This kind of reaction is priceless.

Cosplay is amazing.


Look at her smile!

Thursday, October 2, 2014

Elsa - Frozen

Snow Queen Elsa - Frozen
Bio
Character: Snow Queen Elsa
Origin: Frozen
Year constructed: 2013
Debuted at: My: NärCon 2014

Why
Because I fell for this character instantly. Even before I watched the movie, I saw her design, her hair, and most importantly I saw a clip of Let It Go. Bam. I was insta-crushed on Elsa. I watched the movie and was even more convinced, and full of delight I showed it to my little sister Evelina, and she fell equally for it. So we quickly decided we would cosplay Elsa and Anna together, making it the first serious pair cosplay we ever did. We had done Alexstrasza and Ysera before, but it wasn't that serious of a due cosplay and we only wore it once.

To this story should also be noted that I work at the local cinema in my town, and my boss being awesome and all that he wanted us to cosplay during the Frozen premiere (the premiere was very late in Sweden, in the end of February 2014). This made us even more excited to do a good work, and I'll talk some more about our night at the premiere below :)


A cheater's way to a corset
How
I started with making a pattern for Elsa's corset. I only wanted it to look good didn't put any focus on it being actually functionable (which was stupid and I have no idea why I did that). So I used duct tape to create a pattern which I could then draw out on my fabric.

I have no photos of this, but I recieved a good advice from my friend Christina Erring (Chrix Design) to use thick cable ties as boning for the corset - since I for some reason only wanted it to LOOK like a corset and not work like one. No idea why. I boned the corset like a regular corset (I actually know how to make proper corsets, once again, don't remember why I cheated this one).and sewed it in a satin-y fabric as base. This would later be covered with shiny fabric.

My mannequin is a few sizes too large for me (bought it on
second hand), so the size looks ridiculous.
Base of the cape, soo long.
The skirt was sewn in blue thai silk since I wanted the natural lines in the fabric that Elsa has. Had I remade this costume again I would have used another fabric though, and I would have made the skirt tons longer and painted the ombre. I would change so much haha. The undershirt is made form a gorgeous see-through material which looked like snow up close. Probably my favorite thing about the entire cosplay haha.

A thing to be noted on the slit in the skirt; I am well aware that I made the slit on the wrong side of the dress, but I have a good reason. I have a lot of trouble with my kneecaps dislocating, and as I was making this costume my right leg had just recently dislocated, making my knee swollen, red and ugly. Knowing I would wear this costume in the near future, I made a choice to switch side of the

slit, since I was more comfortable in showing off my "good" knee. A lot of people pointed this out to me, that I had done WRONG, but I don't really care since I did this for my own comfort.

The cape was made from a shiny organza, which I hand painted snow flakes on and sprayed with glitter. As you might know by now, I am a fan of making my own twist on costumes, rather than going full by the book. Which is why I made the snowfalkes less discreet than in the movie, and fewer in numbers. I don't have a good photo of it, but I also bedazzled it with toooons of rhinestones. It was almost three metres long and acted as my private floor cleaning dust-gatherer during cons! The cpae was made detachable so I could easily take it of should I need to go outside or remove it for other reasons.

Started adding squares on to the corset
Back to the corset. I cut out small, square sequins out of a satin-y fabric in two different colors. These were clued on to the corset and shaped around me. This took hooooooours and I wouldn't have finished in time had it not been for the help I recieved from my boyfriend Erik and Herman! The corset is closed in the back with a corset-and-eyelets method, once again something that doesn't excist in the movie but that I added myself because I liked it.

Every part of this costume was covered in rhinestones. Sadly it doesn't show very well on many of the photos, but trust me when I say that many thousand rhinestones were added piece by piece by hand on the entire costume. It was probably my favorite part to make <3

Some of the rhinestones I bought!
The rhinestones I bought from eBay, and came in eight different colors and shades, varying from teal to sky blue, silver and turqouise. All were square to add the square shape of the sequin-fabric.

The pattern on the shirt was drawn out by using pulverized glitter - I painted the pattern with glue and sprinkled the glitter on top of it, and sealed it with a very thin layer of spray glue. Spray glue is awesome since it doesn't leave a thick surface, but rather seals already fastened items (lightweight). The entire costume is spray-glued to add the copious amounts of glitter attached haha.

The shoes were made from a pair of shoes I had at home, sacrificed to make the icicle shape of Elsa's shoes. Again, I took a lot of liberty with the shoes to make them how -I- wanted them to look rather than them being screen accurate. The snow flake shape is worbla which I glued to the shoe, and then covered the shoes in rhinestones and glitter.

Shoes mid-creation!
After the general shape was made for the shoes, I spray painted them with chrome silver. The first version of the shoes were light blue, but I liked the silver look a lot better.

In this photo you can see of the shoes is taken mid-crreation, as you can see there are no stones or paint on the back of the heels.

I was actually starting to make ballerina shoes in the style of Elsa as well, to be able to switch to something if my feet would start to hurt, But sadly I didn't have enough time.

I don't have any progress photos of the wig, but the base is a Matilda from Arda-wigs, and an additional Imladris that I sewed into the wig to add thickness and lenght. They were both in platinum blonde. I had actually never ever done baked-in braids before, so I had to practise a loooooot before I started working on the actualy wig.

Close up of my corset with rhinestones.
I was honestly never happy with how the wig turned out, I restyled it almost five times but I never got really happy with it, sadly.

As I have said before, this entire costume was actually stolen from me. It was in our car when we had a break-in and the car was stolen from us. It wasn't that bad (except for the wig, which I really miss) because I was never really satisfied with how the costume turned out. It was waaay too rushed and the fabric choice and methods were poor. Should I remake it today I would use completely different methods for almost everything. But hey, you learn from your mistakes!


Thoughts
Even though I wasn't very satisfied with the cosplay in the end, I have had toooooons of fun in this costume. Mostly because of the time I spent with my sister as Anna, both on cons and also on the cinema at the Frozen premiere. It's amazingly fun to cosplay sisters with your real sister, trust me. Also it's so EASY to cosplay with someone you've known for your entire life, cause you don't have the barrier of politeness that you might have with friends. If my sister's wig was messed up, I could just tell her "Hey dork, your wig looks like a butt you gotta fix that" and she would just shrug and fix it, haha. You don't have to be so sensitive with your sister cause you know each other so well, which makes cosplaying together soooo much easier <3

Back to my experience at the cinema; it was amazing. Nowadays I cosplay at my job basically at every big event, simply because they let me and I I love it so much, but the Frozen premiere was our first time. This is a blog post I wrote the day after the movie premiere;

"And so, the Frozen premiere here in Sweden was over. It's been an incredible weekend and I have had so much fun it's crazy. I guess I was expecting to some extent that the children would be somewhat happy to see us, but I was -not- prepared for how outright extatic some of them would be! I promise you, some of the young girls we met (and some of thte boys too actually), were so excited they just screamed out loud and ran up to us, wanting to take photos and talk to us. I love kids (I should since I'm studying to become a kindergarten teacher) and to know that we brought so much joy to them was the best thing that could have ever happened.


As for now, I'll put Elsa on the shelf for about a month, until it's time for NCV, and after that I have no idea what will happen to the costume. It stings a little since I have so much love for Frozen and Elsa especially, it was a long time since I bonded so much with a character, haha, mostly because of Idina Menzel's excellent voice acting and performance of Let it go.

Let it go means a lot to me on a personal level, since I just got through two of the hardest years in my life. There has been a lot of turmoil and shitty times but finally things seem to settle and to me Let it go just represents all the crap I went through, and the way everything worked out well in the end. Might sound a bit silly, but I connect a lot to music and songs, and Let it go will always have a special spot in my heart 

Another reason why I love cosplaying from Frozen is because I get to do it with my younger sister. I love cosplaying with her, she's one of my absolute closest friends and sources of inspiration and to be able to cosplay actual sisters with her is just the best thing ever. All hugs and kisses to you, Evelina!"


That said, I would love to remake Elsa some day in the near future, she needs redemption both because I rushed her and because she was stolen :( I might make a Sailor Moon version of her next summer, along with a huge group of other Disney Sailor Senshi, that would be really great!


Photos
Click for larger versions!
Photos by me Gustav Borg, Daniel Ahlberg, Jonna Stendahl, plus me, my sister and boyfriend.


Me and my sister at the cinema during the Frozen premiere

My boyfriend as Kristoff, and me and my sister at the Frozen premiere!
Gorgeous photo-manip by Gustav Borg!

Adorbs sister <3


Duckface selfie at the cinema!

Me, my sister and bf ad the Frozen premiere
That one time when all the Elsas let their hair go, except for one because she wasn't there in the story yet.
Photo by Daniel Ahlberg


A commission I did for a 9-year old customer,
a kid's size Elsa dress. She was so c
From when my fb-page reached 1900 likes,
sister selfie!


Monday, September 29, 2014

The Golden Crown of Bethmoora

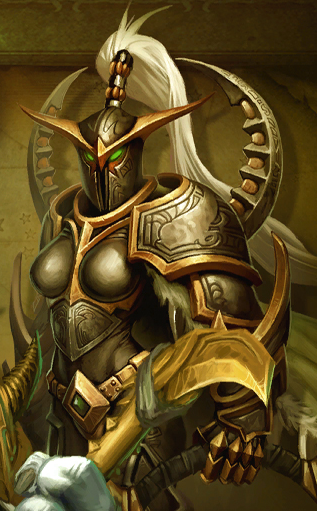
Luke Goss as Prince Nuada with the golden crown
Materials used:
- Paper
- 2mm craft foam
- 4mm craft foam
- Acrylic paint
- Gloss laquer/varnish
- Flat surfaced paint brushes
- Pen and scissors
- Worbla (optional)
- Crafting knife


When me and my boyfriend decided that we would cosplay as Nuala and Nuada from Hellboy 2 this autumn, we were well aware that a variety of props and accessories needed to be made.

Seeing as Erik (boyfriend) would have the most challenging costume with many different parts, both armor and cloth, I volunteered to make the golden crown. Because the only thing I dislike about Nuala's outfit is its lack of details and hard props, which is why I'd gladly make the crown for Erik, just for something to do, haha. I'm not a very good seamstress and I seriously needed some good old-fashion crafting to take my mind of all the sewing!

The first thing I had to do was actually the hardest - gather reference photos. There are -no- good close up photos of the crown, so I did the next best thing; I bought the movie and played it in high-res on my tv, pausing to snap photos of the crown in detail! Trust me, it was an eeeendless process of rewinding, zooming and pausing. If anyone needs a batch of gazillion photos of the crown of Bethmoora, let me know. 

Drawing out the patterns in paper
After I got the reference photos, I started drawing out the pattern on paper. The crown needed to fit Erik's head - with a wig on - so I measured around his head and cut out a paper circle that fit his head, which I then used to measure and work on as a base for the crown.

I created a paper mock.up of the general shape of the crown's three parts, and obviously I had to adjust the shape a bit to fit Erik's head. When you make this type of prop it's important to take into account if the person is going to wear a wig/hat/other under it, to make sure the size fits!

After the paper crown was finished, I cut out the three general shapes in the thick craft foam (4mm). I chose to make the crown in foam because it's easy to cut in and work with, and it's easy to coat and varnish afterwards. However, as most of you know who has ever worked with craft foam, it's also very floppy and not very sturdy. This is why I attached a backside of worbla to the crown, to give it some stability. 

Finished paper crown, looks huge on my tiny wig-head.
Wig is the base of my Nuala wig.
I cut out a shape of worbla just as big as the backside of the foam, and shaped it around Erik's head. If you won't have access to Worbla, there are many other materials that work just as well. Stiff cardboard, pizza boxes, foamboard, plastic, just about anything stiff you can find.

With the base of the crown cut out in thick foam, I started with the never-ending work of making the details in the thin foam. This took a lot of time. I chose to make a texture in the crown with thinner foam just because it's nice to get a 3D-feeling of it, rather than to just paint on the pattern on the thick foam.

I experimented with cutting with both scissors and crafting knives, and really both work, it's just a matter of your own preference.


Some pieces of the thin foam.
It helps to have the two foam types in different colors!
Luckily, the crown is made out of three repeated pieces (plus the front piece), which meant that I only had to make three patterns that I could repeat over and over.

I think I watched through almost an entire season of Family Guy while drawing out and cutting these pieces. This type of craft foam is so thin and fragile, some parts are impossible to cut with a knife and you'll have to use a scissor.

Of course, this is not something you HAVE to do, if you want to you can just draw out the pattern onto the thick foam, but I wanted the crown to cast natural shadows (I have a thing for natural shadows) so that's why I went through all this work. It really pays off in the end!


Placing the thin foam on the thick to get a sense of it!
With all the pieces cut out, I placed them on top of the thick foam, just to get the general shape. After I was satisfied with how it looked, I glued the thin foam onto the thick foam (which I already cut out).

When it comes to glue, I tried out different types and techniques. It's almost impossible to apply the glue onto the thin foam without having the glue dry before you're done applying it, which is why I chose to glue on the thick foam instead and then just press the thin foam on to it.

This was impossible with hot glue, since it dries super fast and is very thick and hard to spread over the thick foam without getting a rough surface. So in the end I opted for clear all-around glue, which takes longer to dry, giving you more time to adjust the placement of the thin foam bits.

Before and after first layer of detail paint. To the left is
only spray paint, and right is first layer of acrylics.
After all the pieces were glued together, I sprayed a layer of gold on it. For spray paint I always use Molotow paint, it lasts longer, attaches to basically everything and is of great quality.

When the thing was sprayed, it was time for detail paint, my favorite! I always work with acrylics for this type of detail on foam. Starting out with the dark colors, I filled inthe corners and nooks of the crown, creating shadows. Then I work my way on to lighter and lighter colors, ending up with almost white on the outer edges.

For the black lines on the crown I simply used a black gel-marker. It applies color and also dents the foam to create a crevice-effect. Perfect.

When it comes to detail painting gold, I love LOVE using different shades of gold. Just mixing gold with silver or black creates gorgeous colors which you really can lift a piece with. Remember, a good paint job can cover up a crappy craft job.

After it was painted, I applied many layers of laquer/varnish to give it a stiff surface and some shine. There are maaany types of laquer, so you really just have to test on small pieces of foam and chose the best one for yourself :)


This is how the crown ended up (it's not attached to each other in this photo, only taped together). As you can see it looks HUGE on my tiny head, but this is why I shaped it around Erik's head and not mine :) 

Tuesday, September 23, 2014

Griffith - Berserk


Griffith Millennium Falcon armor - Berserk
Bio
Character: Millennium Falcon Griffith
Origin: Berserk
Year constructed: 2013
Debuted at: ConFusion: 13

Why
I could go on and talk for yeeears about him, but I won't. I chose to make this costume because it's absolutely beautiful. My boyfriend is actually the one who talked me into doing Griffith in the first place since he wanted to do Guts, so I started reading it because I was asked to, and then I was stuck. I chose the Millennium Falcon armor because it's my favorite, and since my boyfriend was making the Berserker's Armor thye would fit well together. After a while, our Berserk group grew and grew and culminated at NärCon Vinter this year where we had a huuuge Berserk group, a real dream come true!

How
The first thing I did was to draw out the patterns for each armor part on hard paper. I did this even before ordering my material, to get a feeling of how much I would use. I had already decided that I would do the costume in Wonderflex, due to several reasons. The most prominent reason being that Wonderflex is better than Worbla when it comes to larger, flat surfaces, which Griffith has a lot of. It's also easier to carve and make patterns on since it's thicker.

Various armor pieces in paper.
I also drew out each feather form directly onto the pattern, again to get a feeling of how the end result would look like. These would later be carved out in the Wonderflex to give a sense of texture.

What's really important when you're making a full body armor is that the pieces resonate with each other and gives you full movability, hwnce you need to try on the pieces in paper before you actually make it (or you don't HAVE to but it helps). The pieces also need to look good size-wise next to each other, which is extra important with a costume with this many pieces.

After I made all the patterns I got some help from my boyfriend to tape them all together to try them on. Obviously you only need to make one set of patterns for legs and arms.

Trying on the finished paper-armor!
When everything fit as it should and I felt like I could move properly, I ordered my material and got ready to work. For this costume I required 2 jumbo sheeths of Wonderflex (a thermoplastic which can be heated and shaped) and around 50 A4 sheeths of craft foam, mainly.

Working with Wonderflex is time consuming and really tests you patience if you haven't worked with it before. It takes a lot longer time to heat than Worbla, and hence takes longer to cool down, which can be both a good or a bad thing.

I used a half-sandwhich method for this costume (you take a piece of wonderflex, put it on top of a sheeth of craft foam which is just a tad bit smaller, and wrap the Wonderflex around the back of the foam, hence creating a sturdy piece with Wonderflex on the outside), because since Wonderflex is so thick I won't think it neccessary with a double sandwhich method (where you use Wonderflex on both sides of the craft foam).

Chest plate almost finished, unpainted.
The hardest part was to get really flat surfaces, since Wonderflex tend to create air bubbles between the Wonderflex and Craft foam, but I found out that heating the Wonderflex and pressing it on a hard, flat surface until it cooled off was the easiest way, and it turned out great.

The feathers were hard. I tried a variety of different methods and tools, and in the end I ended up with using a cheese slicer and a bread knife to make the little dents, folds and lines. I wanted to make the feathers elevated enough to cast natural shadows, which you can clearly see on the picture of the unpainted chest plate here.

The two external feathers on my collarbones were elevated out from the chest plate, allowing me to tie my cloak around them :)


The arms took a lot of time since they have the largest amount of feathers on them. The upper armguards are fastened with D-buckles and velcro, and so are the lowere guards. The elbow guard is simply held in place by the sheer pressure of the other two pieces :) I was actually able to move quite well in the arm pieces, something that was very important since I wanted to be able to flip my sword around a lot! The shoulderpads were also fastened very loosely for the same reason.

For the elongated parts (like the four long feathers on the elbow) I used wonderflex to cover the back of them as well, since the back would be visible from behind me. I did this with all feathers that were long enough to show their back.

The legs were a challenge. I needed to be able to move around freely and walk normally, and I didn't want the pieces to be heavy either. The legs are made up out of five pieces - feet, shin guards, two knee-pieces and upper leg armor. Since Griffith fights a lot from horse back, the back of his armor is completely bare (making things a lot easier for me!). Every leg armor piece is fastened separetely to the leg, but also latch on to each other. To make it all stay up, I have long velcro straps that hangs from below my chest piece, and that goes under my shirt and tights to hold up the upper leg guards, like a pair of invisible super fancy stay-ups. It spreads out the weight of the leg armors to my shoulders and back, making it easier to move and walk in the armor pieces. Everything is fastened with D-buckles and velcro.

The base blade of the sword is made out of oak, courtesy of my boyfriend. I sanded it and coated it and painted it in silver chrome to make it shiny and pretty. Even though it's very thin it's super sturdy, oak is a very good material for swords, even though it might be a tad expensive. The hand guard and golden ornaments are all made in worbla, and I also padded the handle to get a better grip on it. The sheeth is made out of fake leather, and is attached to several leather straps that goes around my waist.

The only part of the costume that isn't worbla is the "skirt" part, which is worbla. Seeing as Wonderflex is very sticky and fastens to itself very well, I didn't use any glue at all for this costume, except to fasten the velcro and D-buckles.

I also used two different wigs for the costume; one that is very mang accurate and super curly, (I curled it myself by braiding it strategically and the nboiling the wig). But for NärCon Vinter I wanted a new wig since I wasn't very fond of the sheep curls, so I bouth a beautiful long wig from Arda wigs which I tousled and cut, and I'm much happier with that wig, even though it's less accurate. It simply looks better.

Thoughts
I had so much freaking fun in this costume it's insane.We had the opportunity to shoot with several talented photographers in these costumes, such as Mattias "Artano" Persson, Shila Forsman and Gabriel Kulig. The photos are all gorgeous and you can view some of them just below here.

Sadly, I no longer own this cosplay. It was stolen from me when someone broke into our car and stole it, and I haven't seen a trace from it since. It's very sad seeing as I put a lot of work into it, but "luckily" it was stolen after I had worn it many many times, and I'm not sure if I would have worn it again anyways. Still sucks though!

I'm certainly not done with Griffith, I really want to make his Golden Age armor as well as his Ball outfit, along with my wonderful group and friends that is my Berserk-family, haha <3


Photos
Click for larger versions!

Photos by Tomasz Niewiarowski, Shila Forsman, Mattias "Artano" Persson, Gabriel Kulig and various others that I don't know the names of sadly.


LOVE this photo of me and my boyfriend taken by Shila Forsman

Back shot taken by Shila

Knee detail by Shila

Not the entire group, but almost. Guts and Schierke on the good side
and me and my apostle-bros Irvine, Grunbeld and Raskas on the evil side!


From the stage at NCV

Griffith v.1 taken on ConFusion by Artano

Photo from Gamex by Shila Forsman

Herpin and derpin with Guts

Was judging the cosplay show and apparently
it was very interesting.


Burger King Griffith

Early makeup test, me and boyfriend.


Friday, September 19, 2014

Maiev Shadowsong - WoW


Reference - Maiev Shadowson
Bio
Character: Maiev Shadowsong
Origin: World of Warcraft
Year constructed: 2014
Debuted at: DreamHack Summer 2014

Why?
Why not??? Maiev is one of my favorite characters from the entire Warcraft-series, and with her new sleek armor from the Outland loading screen, I really had no choice. I love that she's not as over-sexualized as many of the other female WoW-characters, she has these badass freaking shoulder pads and this imposing helmet, not to mention her -weapon-. Love her from the bottom of her boots to the top of her fuzzy little white ponytail <3

How
Maiev proved a challenge because I only had less than two weeks to actually finish the costume. All of a sudden I decided I should try competing in the Dreamhack Cosplay Championship with this costume, and because of work and other grown-up-biz, I had to finish her in twelve days.

I started with drawing up all of her armor pieces on cardboard, to get all the proper measurements and get a sense of how the pieces would look together. This is something I always do for all my armor costumes, to save material and in the end, time. After that was done, I started with building her chest piece, seeing as that would be one of the three hard parts of this costume (the helmet and shoulders being the other two.) Please note that I worked only with the artwork as reference, and it differs a LOT from her in-game model. I tried combining them at first, but quickly realized they were much too different, so I had to improvise on the parts that are poorly shown in the artwork.

Chest piece in the making.
Please do not note the mess in the background.
The base is made out of worbla, which I shaped over my mannequin. The edges are simply made in craft foam - I had very little time and even less worbla to work with, so we were back to the BASICS while making this costume. I covered the entire thing in several layers of wood glue -it's great for smoothing out craft foam, if you mix it wit ha little water to prevent the brush fomr making brush strokes. After that was done, I jumped directly onto the helmet. I made it out of paper first, just as with the other armor parts, and it took me a little more than a day to get the beak in a good looking size, as well as make the "ears" on the helmet even and well balanced. The helmet was also coated in wood glue.

Testing the shoulders for size.
In this photo they look very uneven
due to a crappy angle though :P
The shoulders were hard. They are very signature for this character, so I had to get the shape right, but still curve the sholder "blades" enough so that I would be able to turn my head without the helmet ears bumping into the shoulder blades. Also they blades had to look symmetrical, so the shoulders really had to be -identical-. They are made out of expanding foam, which I then covered in paper clay, sanded, sanded some more, sanded even more, and finally painted and coated. They are stuffed with upholstery foam to help my weak, small real shoulders to support them. They look a lot smaller in photos along with the rest of the costume, but when I wear only the shoulders they are HUGE. The shoulder blades are made in worbla, with craft foam to texture out the details. They were covered in several layers of wood glue as well.

Glaive-blades before being fastened
onto the hula-hoop
After the three main parts, I kind of threw together the remaining pieces - claws for her gloves, armguards, leg guards, shin guards, belt and a few other things. The cape is HUGE and is attached directly onto the shoulder pads, giving me a huge and scary frame. Sadly, her iconic knives which are attached to the cape were what suffered the most from my lack of time, and they were simply cut out in worbla with foam to texturize them.

The glaive is made with a hula-hoop (!) as core, and worbla blades added around it. I covered it in fine filler to make it sturdy enough to throw around, sanded it and covered it in wood glue.

After all the pieces were done, I spent a day painting them, and this is where I wish I'd had have more time, because a good paint job can save a rushed design, but sadly I had to rush the paint job as well. Some day I would love to repaint it, and remake all the details I fell I rushed too much. This costume really looks better from a distance, if you look close you can tell I hurried it. But it doesn't really matter, because I'm proud as heck I managed to do it in such a short time anyways.

Finished glaive


Thoughts
Despite rushing this costume so badly, I came in 2nd place in Dreamhack's cosplay contest. I did NOT expect that, since the single reason I even entered the contest was because both Yaya Han and Kamui were judging the contest, and them being two of my largest inspirations when it comes to cosplay, I really wanted to meet them. Ending up in second place in a contest judged by them was just a bonus, the real prize was knowing they actually looked at my costume (senpais noticed me!).

Even though there is a LOT that can be done better with this costume, I love where it took me and I love that I proved to myself that I can work really fast under pressure. Never want to rush a costume this badly ever again though :P 


Photos
Click for larger versions!
Photos taken by Shila Forsman Photography and Dreamhack's Flickr. 

All the winners posing with Yaya Han and Kamui!

Details

First time trying the half-finished costume on!

Yaya Han instagrammed me /dies

Details

Lovely stage photo by Shila Forsman


On stage

On stage
Almost finished helmet and glaive